
DIY Zellige-Inspired Terracotta Octagon Dot Tile
- Caroline

- Jul 9, 2025
- 2 min read
This post contains affiliate links, meaning when you click through and purchase an item linked below, I may earn a small commission (at no cost to you!).
When I set out to design our half bath, I knew I wanted it to be a little *extra*. I am a firm believer in taking a lot of risk in a half bathroom - it's a room that nearly everyone who visits your home will use and I think you should pack as much personality in it as you can. During one of my never ending inspiration-seeking scrolls on Pinterest, I came across this image and just instantly knew I needed these tiles.

Unfortunately, I'm on a budget and $40+ a square foot just didn't fit the bill. But, as the saying (sorta) goes: I was born with the "how hard could it be?" gene and decided to recreate them myself. If you love this look and don't mind a little extra work (or have a savvy tile guy who's willing to indulge you (I rarely find those guys, haha...)), here is how I did it!
What I used:
For the Tile
9x9, faux terracotta tile - this tile is budget friendly and very convincing! Each tile has variations, so it looks very natural.
honed marble mosaic with 1" squares - also very budget friendly!
either a tile cutter or wet saw - I just used a tile cutter as I wasn't comfortable using a wet saw at the time. Admittedly, the tile cutter gives you a more handmade feel, but honestly I love that with this look.
For Installation
grout - I used color "Bone" as I felt it gave a sand like look that I think plays into the vibe
*by the way - if you are doing a tile project I cannot recommend buying this grout color sample kit enough! It's saved me multiple times!
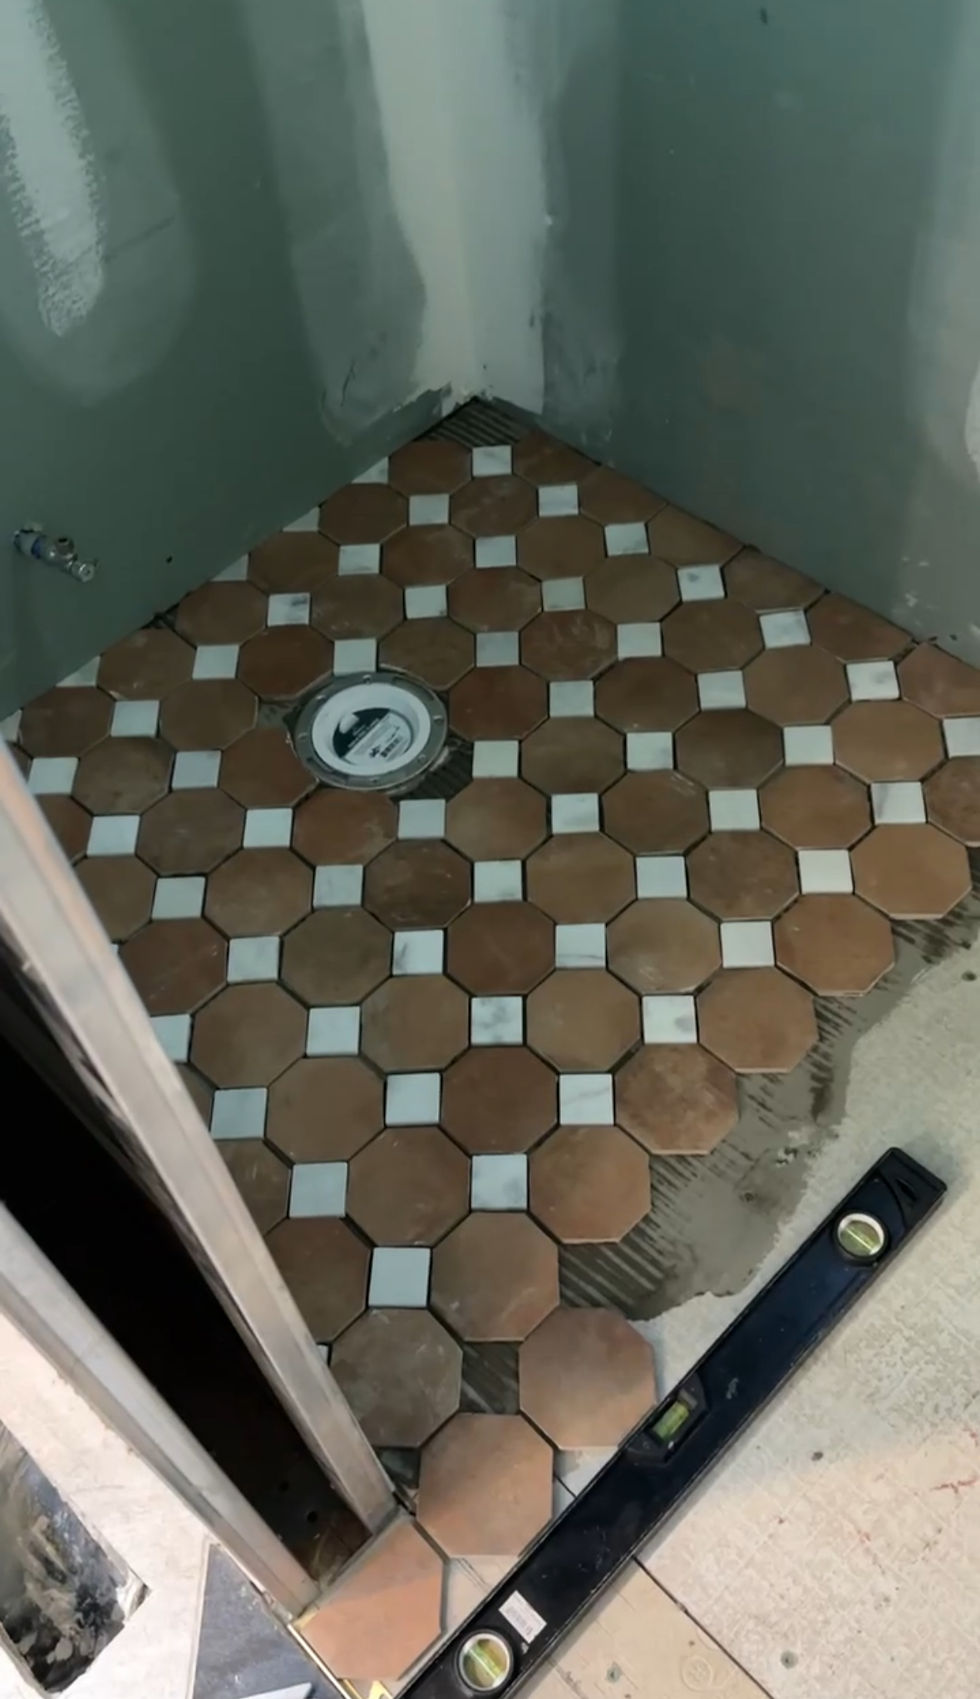
Start with one of your 9x9 tiles

then, cut the 9x9 tiles into quarters

next, trim your corners to create octagons

Since the "dot" is a 1x1" square, we want our new edges to be ~1" in length. Again, I did not shoot for perfection here as I love the handmade look. In order to get that 1" length, you need to measure in ~11/16" on each side of each corner. Then connect the two points surrounding each corner and that's your cut line.
Here is a pretty pathetic diagram for clarification

Finally, add in your dots & repeat for your needed square footage!

Here are some photos of the installation process:


Comments